DECKING INSTALLATION

Before Installation

Before installing Ultradeck Composite Decking we recommend that you seek the advice of a qualified builder, or an accredited deck installer. It is important to be fully compliant with local, state and building codes when planning your building project. When using in high volume traffic and commercial applications, we recommend that you obtain the advice of a qualified builder for the correct installation requirements.

Faq's

Ultradeck Composite Decking planks should always be carried on their side for increased support. It is important to handle Ultradeck Composite Decking planks in accordance with relevant OH&S requirements and not to attempt to lift or carry more than the recommended safe work methods.

Care

  • It is important to exercise care when cutting straps to avoid causing damage to your Composite Decking materials.
  • Composite Decking materials must be supported at least every 800 mm laid flat, never on an angle particularly during transport.
  • Composite Decking should never be dropped or dragged, as it may result in damage to the quality of the material.
  • Composite Decking should be stored on a flat, dry surface at least 90 mm off the ground. To avoid damage, we recommend that Composite Decking materials remain covered until installation.

Splinters, warped boards and popped nails are common problems associated with traditional timber decks. Ultradeck eliminates these safety hazards, welcoming bare feet.

  • Ultradeck’s non-slip surface makes it the ultimate product for your pool or spa deck.
  • Ultradeck’s non-toxic composition makes it safe for the whole family.
  • Ultradeck’s composite decking materials are designed to be used with traditional hardwood tools.
Centre-to-centre joist spacing (max)450mm
Min ground clearance50mm
Min side-to-side gapAuto Spaced by Clipfix – Conventional Method 4mm
Min end-to-end gap (butt join)1mm
Min gap for side edge to solid structures 3mm3mm
Min gap for end edge to solid structures3mm

We recommend using conventional hardwood cutting tools when working with DynamicDecking Composite Decking.

After installation you must thoroughly clean your deck to remove any leftover dust from the manufacturing process.

Ultradeck Composite Decking materials can be cleaned by using a low pressure washer that is no greater than 1500 PSI and it should not be applied closer than 25 cm from the decking surface.  Use a normal fan nozzle and not a dirt blaster type nozzle.

  1. Thoroughly wet deck.
  2. Use hot water with bi-carb soda and pour over your deck.
  3. Scrub in the direction of the grain with a stiff bristle broom to create a white slurry.
  4. Continue to work in sections until the whole deck is thoroughly scrubbed.
  5. Give the deck a good rinse, ensuring all water runs off the deck. Where possible, try not to let the water pool.
  6. Mop wet areas with a clean mop, or alternatively, use a squeegee to push water off the end of the deck.

CONVENTIONAL SCREW FIXING

We recommend pre-drilling and countersinking all holes when installing Composite Decking.

Pre-drilled holes must be at least 15 mm away from the end edge of the decking board and 20 mm from the side of the decking board.

Fixing should be at least two fasteners and every joist.

Nailing is not recommended for fixing Ultradeck composite boards.

CLIPFIX – HIDDEN SCREW STANDARD FIXING

Using the Clipfix standard system will leave approximately a 6-8mm gap between boards.

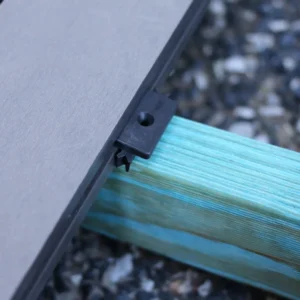
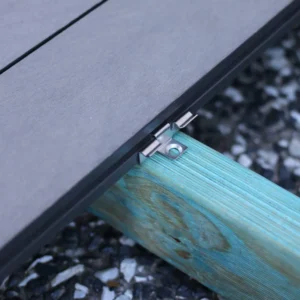
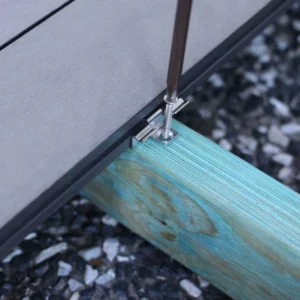
  1. Insert the Clipfix clip into the groove as shown.  Screw down approximately 4 mm to hold the clip in place.
  2. Get your next board and push into place.
  3. Repeat these steps and lay approximately five boards. Ensure your boards are square, adjust as necessary.
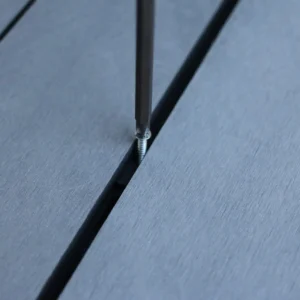
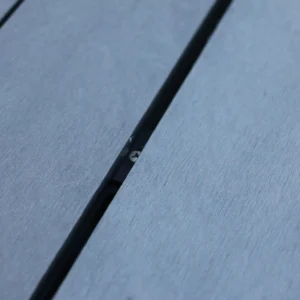
  4. Screw down the aligned decking. Do not overtighten, use a low medium torque setting on your drill.
  5. Repeat steps 1 – 4 until you have completed your project.

CLIPFIX – HIDDEN SCREW PREMIUM FIXING

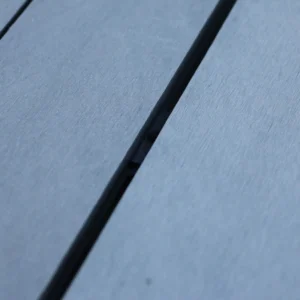
Using the Clipfix premium system will leave approximately a 4mm gap between boards.

  1. Insert the Clipfix premium clip into the groove as shown.
  2. Align board into position.
  3. Screw down the aligned decking. Do not overtighten, use low medium torque setting on your drill.
  4. align second board and push/clamp onto previously screwed clip.
  5. repeat steps until you have completed your projec.